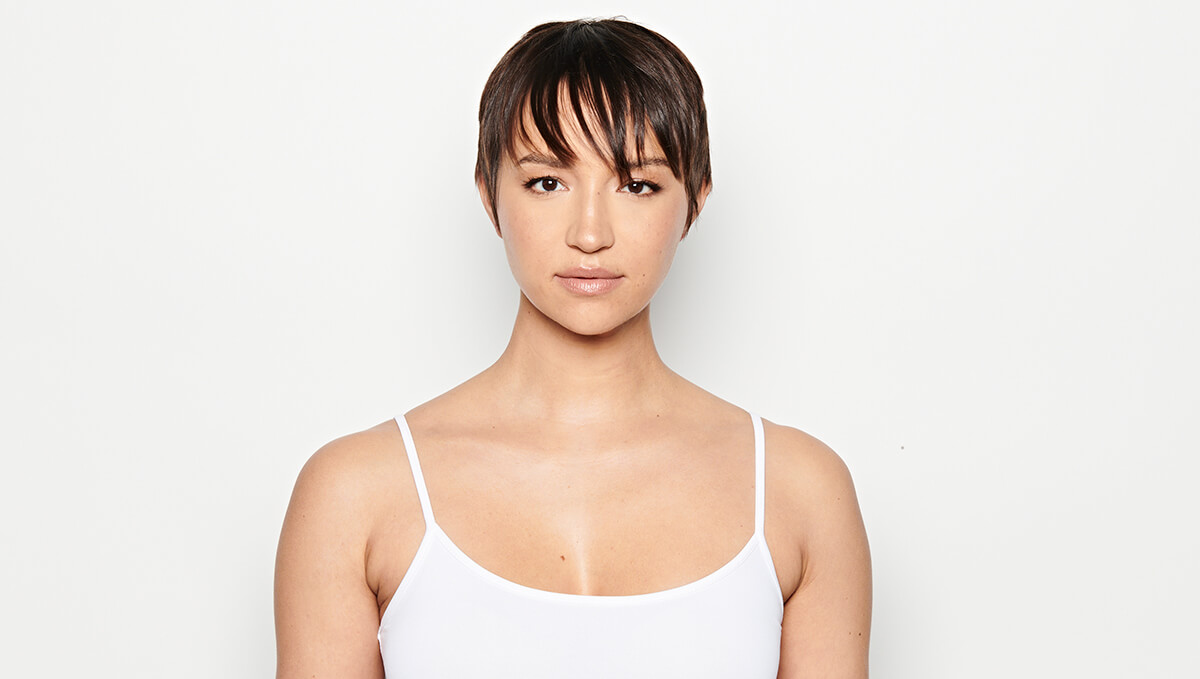

“A blonde pixie?! Yes please! I love when clients want to get creative and try new things with their hair. Briana has beautiful rich brown level 4 hair that I knew needed the lifting power of Blonde Life®. Blonde Life Lightening Powder would be the right product to achieve the desired results while maintaining the integrity of the hair during the process.”
Prep Treatment – Defy Damage ProSeries 1: Bond-Protecting Color Optimizer
Formula 1 – Blonde Life Lightening Powder with 20 (6%) Volume LumiShine Developer
Formula 2 – Blonde Life Lightening Powder with 30 (9%) Volume LumiShine Developer
Formula 3 – (Root Tap) LumiShine Demi-Permanent DD Crème 6NA + 6SB with 5 (1.5%) Volume LumiShine Developer
Formula 4 – (Toner) LumiShine Demi-Permanent DD Crème 10SB with 5 (1.5%) Volume LumiShine Developer
Post Treatment – Defy Damage ProSeries 2: Bond-Strengthening Color Treatment
TECHNIQUE

STEP 1:
Prep with Defy Damage ProSeries 1. Shake the can vigorously and then spray in short bursts to 2-inch (5cm) sections and comb for even distribution.
Tip: When working on short hair, use a fine tooth comb to spray and comb ProSeries 1 at the same time for even saturation.

STEP 2:
Section out a horseshoe parting along the curvature of the head, the parietal ridge.

STEP 3:
Before starting to highlight your client, analyze the hair fall, texture, and density. This will guide you on where to start. When you start to highlight; take fine, micro-weaves when highlighting in the back. This application should be feathered and blended using Formula 1. Be sure, when working in the back, not to take too wide of a section so you do not create a line.

STEP 4:
When working in the back area, take diagonal micro-weaves working throughout the back.

STEP 5:
Continue to work throughout the back in the same manner. This highlighting manner should be completed in the back to the crown where you took the horseshoe parting.

STEP 6:
Continue until the back is completed. Check your foils for processing. If the back is light enough to your desired results, rinse, shampoo, and condition.

STEP 7:
Starting in the front sides, take diagonal back micro-weaves and continue highlighting the lower horseshoe portion. Make sure to analyze the hair on the sides like you did in the back to ensure you are starting your highlighting on the correct length of hair to avoid creating lines or spots.

STEP 8:
Working into the top section from back to front, take diagonal weave partings and apply Formula 2. Starting at the crown, take many diagonal forward weaves to highlight the top section. Don’t leave any hair out to create a massive impact. As you work along, continue to feather the formula at the root. This will create a seamless rooted look for an easy grow out for your client while creating depth and dimension.

STEP 9:
Continue your highlighting application until the top section is fully complete. Go back and check your work, saturation, and monitor the lifting process. If there are sections of the head that are lifted to where you need, it is a great idea to rinse those areas first while letting the other sections continue to process. Rinse and shampoo with Joico Blonde Life Brightening Shampoo. Towel dry the hair gently and continue on to the tap and tone process.

STEP 10:
Using Formula 3, tap the base throughout the entire head. When working in the shorter length sections, use a comb to move the hair out of the way when doing your root tap so not to overlap your formula onto the blonde. Make sure to glide the root tap formula over the line of demarcation to create a blend and correct any spots you may have as you work along. Apply Formula 4 to the mids and ends. Process until desired results are achieved.

STEP 11:
Rinse and Shampoo with Joico Defy Damage Protective Shampoo. Apply Defy Damage ProSeries 2 throughout the head to restrengthen and rebuild the bonds of the hair. Process for 5 minutes. Dry and style the hair using your favorite Joico Stylers.
MORE BLONDE AMBITION
